-
If backset of door measured 2-3/4" (70mm), adjust latch as follows: Grasp the spring pin and move it to the 2-3/4" slot.
For a drive in latch: align collar opening with shape of bolt and slide it on until the notch on collar snaps around the catch pins of latch. Note, should collar require removal, squeeze collar hard at sides and remove.
For latch with face plate: (1) Insert latch into backplate (2) position desired faceplate over latch bolt and snap it onto the backplate
-
INSTALL LATCH
Install latch, making sure that the slant of the latch bolt faces in the direction that the door closes.
- INSTALL OUTER KNOB AND MOUNTING PLATE
- Push in latch and insert knob
- Do not remove screws.
- Slide on and rotate mounting plate.
-
Tighten screws lighty with a screwdriver only, DO NOT use a drill or a power screwdriver.
DO NOT OVER TIGHTEN.
-
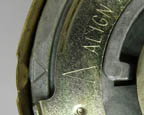
ALIGN ARROWS* AND POSITION INNER KNOB
If required, rotate tab to align arrows using a screwdriver.
(click to see the big picture)
-
ROTATE BOTH KNOBS TO THE LEFT TO SECURE
Turn knobs until latch fully retracts.
Maintenance: Check to ensure screws are tight for safe operation.
- INSTALL STRIKE
Place strike plate over latch and insert screws, adjust tang as needed, smaller bolt should not enter hole.